Are you a Quiet Speculation member?
If not, now is a perfect time to join up! Our powerful tools, breaking-news analysis, and exclusive Discord channel will make sure you stay up to date and ahead of the curve.
A few weeks ago, I brought up Ryuuta Igarashi's GR Aggro deck, which grew prodigious Tarmogoyfs and powered out Blood Moon with Pyretic Ritual. The combination of Moon and Goyf so intoxicated me that I built GRx Moon decks all last winter, and had some success with them last summer. When I designed Abzan Moon, I figured I'd optimized the strategy in Modern. Then, some flirting with Chalice of the Void and Goblin Rabblemaster opened me up to ritual effects, which I had never before considered viable.
This article fleshes out the basic theory behind GRx Moon decks and forays into building with rituals over Birds.
[wp_ad_camp_1]
Anatomy of a GRx Moon Deck
Even as card choices vary, GRx Moon's building blocks remain the same. Consider grow tempo decks, which run cheap threats, soft disruption, and card filtering. Depending on the format and the color combination, "cheap threats" could mean anything from Young Pyromancer to Nimble Mongoose. But in function, those cards perform the same role: resolve rapidly; apply pressure.
Gameplan
Many Modern decks aim to race, but GRx Moon does so in a unique way. The enchantment puts opponents in time-out, and while they look for basics to execute their own gameplans, we beat their faces in.
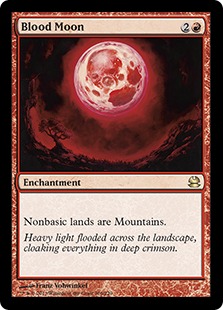
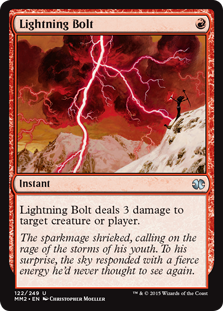
Blood Moon never wins the game on its own. In Modern, Path to Exile persuades even fetchless, utility-land heavy decks like Affinity to run a basic land. Given enough time, opponents will draw their basics. We need to kill them before that happens, chasing quick lock pieces (mostly Blood Moons) with efficient beaters.
~30 Mana Sources
Given the prevalence of fetchlands in Modern, Blood Moon needs to resolve very quickly to have much of an impact. Unless opponents don't anticipate the enchantment, turn three does not qualify as "very quickly." GRx Moon decks mitigate this problem with mana acceleration to push out Moons on turn two. Whether pilots run mana dorks or ritual effects as acceleration dictates how the deck will be built.
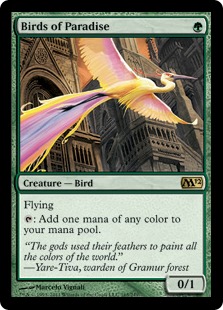 Dorks (permanent acceleration): Birds of Paradise, Noble Hierarch, and Utopia Sprawl give the Blood Moon deck a few options for permanent acceleration. Dork effects help us splash colors, enabling greedy bombs like Siege Rhino. Spare dorks can at least chump block or carry Swords. Noble Hierarch even speeds up our clock!
Dorks also have the benefit of pushing pilots ahead one turn for the rest of the game. If a first-turn Birds doesn't meet a Lightning Bolt, it often just plays like Time Walk. And that's no exaggeration - Birds into Moon into Huntmaster is as brutal as it sounds.
It's not all rainbows. If that Birds does get Bolted (or even Forked Bolted), we could be in a world of hurt. Blood Moon definitely won't resolve until turn three, and we may lack the lands to even make that happen. Running dorks means we can't rely on Pyroclasm effects from the sideboard, and any sort of mana stumble - from a Bolt on a dork to naturally missing land drops - proves very punishing.
Utopia Sprawl doesn't have as much late-game relevance as an actual body, and it expects a deeper investment into green; on a Stomping Ground, Sprawl falls off when Blood Moon resolves, so the enchantment asks us to play multiple Forests. Still, Sprawl makes any color of mana and can't be Bolted, getting around the dork's biggest downfall.
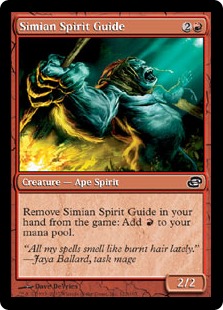 Rituals (one-time acceleration): Simian Spirit Guide, Pyretic Ritual, and Desperate Ritual all provide one-time acceleration at instant speed. The main upside of ritual effects is their explosiveness. I've won games by going Forest, exile Simian Spirit Guide, cast Pyretic Ritual, Blood Moon. Moon needs to come down early to do work, and rituals directly support that plan. They also let us do "something else" on turn-one and still resolve a three-drop on turn two. We can spend our first turn Bolting a threat, or Looting into an optimal turn-two play, and our second playing Desperate Ritual, Goblin Rabblemaster.
One supposed perk of rituals is that they don't force us into green, while mana dorks do. Even I've made this case before, but I now consider Tarmogoyf too integral to the GRx Moon archetype to remove for anything else, even if he's the only green card we end up playing.
As for downsides, running rituals greatly limits our deckbuilding options. We can't lean so heavily on four-drops, since they don't organically follow a Blood Moon. If we use a ritual to cast Moon on turn two, barring the possibility of a second ritual, we'll only have three mana to spend on turn three. Consequently, we're mostly limited to two- and three-drops for threats.
 Blood Moon games tend to go long. Spending all our resources on a first-turn Blood Moon forces us to draw into lands and business, and while the Moon buys us some time, opponents may still get to some sort of late game of their own. It's more important to grow Tarmogoyf really big in ritual builds than in dork ones, since we don't have the late-game staying power of Huntmaster of the Fells or Siege Rhino.
An arrested curve means we seldom need to make land drops beyond the third. Combined with the rituals, which are also "dead" once we get to three mana, our lands give us plenty of dead draws. Faithless Looting assuages this apparently crushing drawback to ritual builds, cycling through the trash to find lands or threats as needed. Earlier, Looting even sets up our ritual plays. And given our reliance on mammoth Lhurgoyfs, Looting's ability to pitch rare card types makes it invaluable.
Simian Spirit Guide is the best ritual effect in Modern. It doesn't need any mana to "turn on" (Pyretic Ritual and Desperate Ritual each require two), can't be countered, and beats down or chump blocks in a pinch. It's a shame we can't run ten of these guys.
6+ Lock Pieces (Permanent Disruption)
In a deck dedicating so many slots to a big, turn-two play, four Blood Moons are never enough. The three-mana slot also houses aggression, but GRx Moon decks almost always need some sort of permanent disruption on the board to tangle with Modern's top decks; without a lock piece to back him up, Goblin Rabblemaster probably won't cut it. Magus of the Moon seems like the best disruptive option after Blood Moon, since Chalice of the Void and Trinisphere do so little against some decks.
4+ Removal Spells (One-Time Disruption)
An enemy threat that slips under Blood Moon can ruin us. I've lost games to turn-one, blind-flipped Delvers after locking my opponent off his colors. Flexible removal like Lightning Bolt, Abrupt Decay, and Dismember ensure that the Blood Moon we've worked so hard to resolve early actually does something. Since Lightning Bolt aids our threats in closing out games, and kills most one- or two-drop creatures in Modern, I consider it a shoo-in at 4. Beyond Bolt, colors and metagame numbers play large roles in determining the best removal options.
10+ Threats
In dork builds, our threats can cost up to four mana. In ritual builds, they probably shouldn't exceed three. More expensive threats interfere with the Faithless Looting engine, since we then become wary of pitching otherwise superfluous lands to the sorcery. In any case, we have plenty of tremendous threats at two, three, and four mana as it stands.
Tarmogoyf deserves reiteration here as a perennial GRx Moon staple. He applies an enormous amount of pressure for only two mana, stonewalls nasty attackers like Gurmag Angler, and synergizes with Faithless Looting and our naturally swole suite of card types. Goyf needs at least six buddies to help him beat up on opponents. I prefer Huntmaster of the Fells and Siege Rhino for dork builds, and Goblin Rabblemaster and Ghor-Clan Rampager with rituals.
Astrolabe: Comparing Moons
In Rogue Trip: Innovation at SCG States, I gushed about a highly confusing GRx Moon deck by Rob Wrisley that contained Burning-Tree Shaman, Hellrider, Eidolon of the Great Revel, and 0 Tarmogoyf. I reached out to Rob, who directed me to the deck's source, Carl Wilt.
Wilt's list, described by its creator in these two articles, marries a diverse hate package to head-turning four-drops.
Hellrider Moon, by Carl Wilt
Creatures
4 Noble Hierarch
4 Birds of Paradise
4 Eidolon of the Great Revel
4 Burning-Tree Shaman
4 Hellrider
3 Phyrexian Metamorph
3 Stormbreath Dragon
Sorceries
3 Bonfire of the Damned
Instants
4 Lightning Bolt
Enchantments
4 Blood Moon
Lands
4 Wooded Foothills
4 Stomping Ground
3 Rootbound Crag
1 Copperline Gorge
2 Treetop Village
1 Kessig Wolf Run
4 Mountain
1 Forest
Sideboard
3 Trinisphere
2 Dragon's Claw
3 Banefire
2 Shatterstorm
3 Damping Matrix
2 Ancient Grudge
With some theory in our skulls, we understand a few things about Wilt's deck right away. Mana-wise, Wilt built his deck around dorks, opting for Hierarch and Birds over Utopia Sprawl. The enchantment doesn't work in this deck since it has no synergy with Hellrider and would demand more than one Forest. Wilt plays a whopping 31 permanent mana sources, allowing him a trio of Stormbreath Dragons at the top of his curve. All those lands soften the blow when Wilt's dorks inevitably get Bolted, as does Hellrider, who punishes opponents for spending precious removal on 0/1s. Flooding ain't a thang with three Bonfire of the Damned in the deck, and Wilt even plays Banefire in the board for grindier matchups.
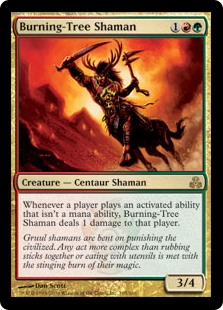 Wilt correctly maxes out on Blood Moon, and adds Eidolon of the Great Revel and Burning-Tree Shaman to his permanent disruption package. (With all the Bolt targets to distract from it, Magus of the Moon is sorely missed in this list.) Eidolon pressures low-curve decks like Bogles, Burn, Storm, and Delver, while Burning-Tree keeps Twin from its combo. Both psuedo-lock pieces double as threats. Phyrexian Metamorph does, too, copying the best lock piece Wilt resolves (or the inordinate Tarmogoyf his opponent does).
Still, Hellrider and Stormbreath Dragon deserve their own section. These hasty curve-toppers steal big chunks of life out of nowhere, and provide short clocks after Eidolon and Burning-Tree wear opponents down. Stormbreath is nearly impossible to remove in Modern, succumbing only to Terminate, Dismember, and the dreaded Vapor Snag. Conversely, Hellrider is hysterically easy to remove, assuming opponents haven't already used their Lightning Bolts.
Wilt's biggest failure is excluding Tarmogoyf, whose bulk makes the comparatively expensive Burning-Tree Shaman and Hellrider look pretty stupid. Wilt already grows Tarmogoyf to 6/7, and outside of copying the Lhurgoyf with Metamorph, or ignoring it with Stormbreath Dragon, he has no outs to the big, green monster himself. He doesn't even mention Tarmogoyf in his articles, suggesting Goyf owes his absence to testing oversights.
In terms of removal, Wilt gets around the "no Pyroclasm effects" rule imposed on dork builds with Bonfire of the Damned, a swingy, one-sided, super-Fireball.
Ryuuta Igarashi's deck plays rituals over dorks, grows Tarmogoyf to 8/9, and packs enough removal to keep the board clean while he mops up opponents.
Rabblemaster Moon, by Ryuuta Igarashi
Creatures
4 Tarmogoyf
4 Goblin Rabblemaster
4 Simian Spirit Guide
2 Magus of the Moon
4 Ghor-Clan Rampager
1 Thundermaw Hellkite
Sorceries
2 Flame Slash
Instants
2 Lightning Bolt
2 Tarfire
3 Pyretic Ritual
3 Desperate Ritual
Other
3 Seal of Fire
2 Pyrite Spellbomb
4 Blood Moon
2 Chandra, Pyromaster
Lands
4 Windswept Heath
4 Wooded Foothills
2 Stomping Ground
7 Mountain
2 Forest
Sideboard
2 Ratchet Bomb
2 Dragon's Claw
2 Spellskite
2 Destructive Revelry
1 Grafdigger's Cage
1 Pithing Needle
1 Torpor Orb
1 Combust
1 Molten Rain
1 Sulfur Elemental
1 Shatterstorm
After going over Wilt's list, we immediately see the deckbuilding effects of switching from dorks to rituals. Igarashi's only four-drop threat can also channel for two mana as a combat trick. He plays a single Stormbreath Dragon and two Chandras to help with flooding, but I think Faithless Looting is a superior plan, since the card has early utility. Despite his low curve, Igarashi still plays 29 mana sources.
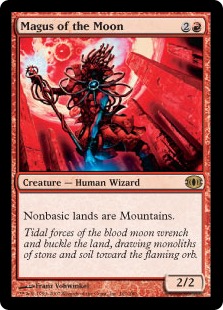 Magus of the Moon makes an appearance here, all but guaranteeing a Moon effect every game. Combined with Goblin Rabblemaster and Blood Moon itself, Magus gives Igarashi 10 backbreaking plays off a ritual. In such a Bolt-dominated format, I'm surprised at Igarashi's success with Rabblemaster and Magus, the only Boltable creatures in his deck (other than Simian Spirit Guide). Still, when opponents don't have a Lightning Bolt, these threats mean business, especially backed by Ghor-Clan Rampager. You can't sneeze at a 12/13, trampling Tarmogoyf, and Igarashi's nine reach effects help end games after a massive attack.
As much as I love Tarfire, these cards seem very suspicious. I understand the draw to huge Tarmogoyfs, but I don't think it's worth slashing Lightning Bolt's numbers for chaff like Seal of Fire. Unfortunately, without Faithless Looting, Igarashi has no reliable way to dump enchantments into the graveyard. He also can't ditch excess rituals.
Mastering the Ritual
MutaMoon aims to improve specifically on Igarashi's list, since I've already developed what I consider an optimal GRx Moon deck with dorks in Abzan Moon. Now, I'm trying my hand at perfecting a build with rituals.
MutaMoon, by Jordan Boisvert
Creatures
4 Goblin Rabblemaster
4 Tarmogoyf
4 Simian Spirit Guide
2 Magus of the Moon
3 Ghor-Clan Rampager
Sorceries
4 Faithless Looting
Instants
4 Mutagenic Growth
4 Lightning Bolt
2 Tarfire
4 Desperate Ritual
2 Pyretic Ritual
Other
4 Blood Moon
Lands
4 Misty Rainforest
4 Wooded Foothills
1 Windswept Heath
2 Stomping Ground
2 Darksteel Citadel
5 Mountain
1 Forest
Sideboard
2 Spellskite
2 Destructive Revelry
1 Ancient Grudge
1 Grafdigger's Cage
1 Dismember
1 Flame Slash
1 Rending Volley
2 Anger of the Gods
4 Molten Rain
My biggest changes to Igarashi's skeleton are the inclusion of Faithless Looting and Mutagenic Growth as four-offs. I mostly trimmed removal to make room. Even without a full set of Lightning Bolt, Igarashi plays a hearty 11 burn spells. An Anger of the Gods plan from the sideboard does more for less, since Looting can pump Tarmogoyf without forcing us into a bunch of Shock effects. Anger doesn't conflict with Rabblemaster and Magus, since in the matchups we want it for, it should resolve before them.
Just Big Enough
If we're going to consider Magus and Rabblemaster "worthy" three-drops to spend cards ramping into, we need to protect them from Lightning Bolt. Mutagenic Growth does just that without costing any mana, pumping them to the crucial x/4 mark. I've analyzed high-impact, high-fragility threats in Modern before; In Some Bobs With Your Bugs: Confidant in Delver, I posit that protecting Confidant for just one turn with Disrupting Shoal can win games.
 The same applies to MutaMoon. Opponents only have so many Lightning Bolts at their disposal. By the time they find a second one, Rabblemaster will have made us a few Goblin tokens to chip at opponents, or to chump their racing beaters as Tarmogoyf attacks them. We may even have drawn a second Growth by then. Similarly, protecting Magus for a turn gives us time to find an actual Blood Moon and put opponents off colors for good.
Against opponents without Lightning Bolt, Growth is far from dead. It becomes damage with an unblocked attacker, messes up blocking decisions, and wins us Tarmogoyf wars. Most importantly, Boltless decks can't beat Goblin Rabblemaster anyway.
Other Tweaks
For the mana, I mostly stuck with Igarashi's numbers. MutaMoon has the same amount of Moons and rituals. Thanks to a set of Faithless Looting, I can run Darksteel Citadel instead of two Mountains to grow Tarmogoyf with minimal harm to the hyper-stable, two-color manabase. I traded the second Forest for Windswept Heath, another turn-one red source, to compromise.
I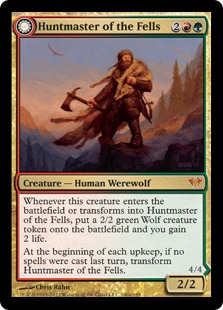 originally ran a pair of Huntmaster of the Fells in this deck. Huntmaster gives us a way to recover once we resolve Blood Moon if opponents have been pressuring us, and he provides two bodies against grindy strategies. He can also carry games on his own against weenie decks like Soul Sisters, and can be saved from Bolts with Mutagenic Growth. Unfortunately, four mana is a lot in a Faithless Looting/Pyretic Ritual deck, and Huntmaster didn't solve the problem of Rabblemasters (and occasionally, Goyfs) getting walled. I finally cut the Huntmasters and a land for three Ghor-Clan Rampager, which trumps Huntmaster against Goyf decks and strategies with more inevitability than us, including Twin and Tron. Huntmaster still smashes small aggro decks and may have a home in this deck's future.
Matchups and Sideboarding
Blood Moon wins a lot of matchups on its own. For small aggro decks like Merfolk or Zoo, Anger of the Gods in the sideboard has tested very well, and linear aggro decks (Bogles, Burn, Infect) have trouble winning through Spellskite + Tarmogoyf. Ancient Grudge and Destructive Revelry compliment Anger against Affinity, which isn't a deck Modern players can choose to ignore.
Splinter Twin, which can laugh off a Moon, is the Loxodon-in-the-room deck-to-beat for GRx Moon, and both Wilt and Igarashi take special precautions against the strategy. Wilt plays mainboard Burning-Tree Shaman, while Igarashi favors traditional hate like Spellskite and Combust. I've found the matchup easier than predicted, and have been happy with just one Rending Volley. Molten Rain and Dismember also pull their weight in this matchup, and the fact that Twin relies on cards like Roast to kill our incidentally gigantic Goyfs makes the fight even fairer.
This deck's biggest issue is actually dealing with opposing Tarmogoyfs. Unlike Abzan Moon, MutaMoon doesn't boast the versatility of catch-alls like Abrupt Decay. I tried Engineered Explosives, and Igarashi's incredibly slow Ratchet Bomb tech in the sideboard, but wasn't impressed. So far, Flame Slash, Dismember, and well-timed pump effects are all we've got.
When the BGx decks do beat us, it's because they sneak one or two Goyfs under a Blood Moon and put us on the defensive. Post-board, our removal couples with Molten Rain to get opponents off Goyfs for the game. But until I discover a more graceful solution, game one still revolves around who sticks more Tarmogoyfs.
I like a set of land destruction effects in the board of all GRx Moon decks. Games two and three see opponents wisely fetching basics, and blowing those basics up unfalteringly turns smugness to salt. Land destruction also screws the inevitability decks GRx Moon has historically struggled to beat. In builds that can afford the double red, and barring some magical Pillage reprint down the line, Molten Rain triumphs over other options.
One Small Step For Goblin...
I doubted ritual effects when I first laid eyes on Igarashi's list. Recently, I've come to appreciate that those horrible instants represent a viable building path for GRx Moon decks.
Compared with the grindier Abzan Moon, MutaMoon shines against linear combo strategies, and performs better against Lightning Bolt. It's also just really fun to slam turn-one Blood Moon and attack with Goblin Rabblemaster, no matter how mean. After all, sympathy is for weaklings.


 '
'


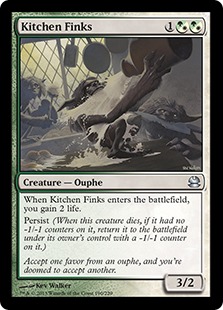 Kitchen Finks is at its best when trading with small creatures, leaving us up a card and up life. Most of the spells it trades with cost less than two mana (Goblin Guide, Merfolk without Islandwalk, Snapcaster Mage, Memnite) so its three CMC can often be a little awkward. As a result, Kitchen Finks is often seen alongside green acceleration like Birds of Paradise and Noble Hierarch (like in my
 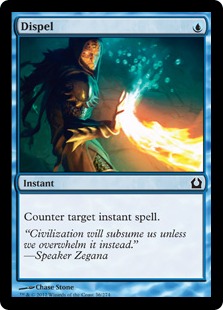 Before, Dispel was a liability against the plethora of creature decks in the format, but today even creature-heavy lists like Elves and Naya contain great targets like Collected Company. Similar to Tarmogoyf, delve creatures force opponents to keep in removal after board to interact (as 4/5’s and 5/5’s are just a little too big), which walks them right into our Dispels. Playing as Grixis, I've won many gameson the spot when I countered a Collected Company, or Path to Exile aimed at my Gurmag Roadblock, for one blue mana. Dispel is still excellent in the blue mirrors, and great against combo as well. Any deck with a or tempo element can appreciate the cheap interaction it provides (Grixis Delver/Control/Twin, Merfolk, Knightfall) and even pure combo and control can use it as well (though Jeskai and U/W often opt for the more versatile Negate instead).
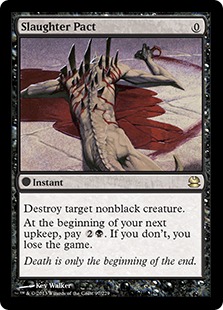 When Twin was dominating Modern, Jund turned to Slaughter Pact to help fight the archetype, though it proved largely unnecessary as Liliana/Thoughtseize/Terminate were often good enough. It does fine work against Amulet Bloom, and is passable against other creature decks, assuming we build to mitigate its downside. Decks that pack things to do that don’t require mana, like drawing cards with Dark Confidant or activating abilities of planeswalkers, can “work around” the lost mana that comes with Slaughter Pact, but the real trick is to pair the free spell with a strategy that can use the tempo advantage.
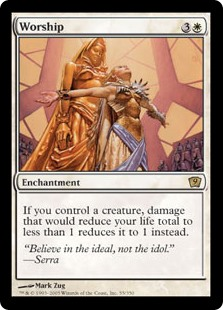 Most decks in the format have difficulty killing everything, which makes Worship a pretty resilient soft-lock in many matchups. Burn can’t beat it outside of a Destructive Revelry, which can be non-intuitive to bring in against the Worship deck, depending on what we’re playing. Decks like Affinity and Collected Company really have no hope. We just have to kill Affinity’s Inkmoth Nexus’ and dodge Qasali Pridemage or similar effects against the Company decks. Even Grixis Control has trouble beating it, as it is impossible for them to remove it once it resolves (now that the latest Grixis list has moved away from Cryptic Command). Worship punishes the lack of sweepers in the format and takes advantage of an over-reliance on cheap, interactive one-for-one removal to fight Goblin Guide and Deceiver Exarch. Splashy, unique enchantments like this can take a stale metagame by surprise (as Bitterblossom was doing a few months ago) and I’m sure there are other gems like Worship out there just waiting to be exploited.
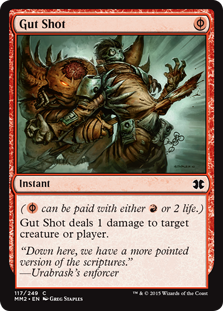 For those that do, however, Gut Shot is really great right now. Shooting down Birds of Paradise, Glistener Elf, Delver of Secrets, Dark Confidant, Signal Pest and others on turn one, Gut Shot has no shortage of targets in Modern. I like Gut Shot for many of the same reasons why I like Slaughter Pact, so we can think of it as a really narrow Slaughter Pact without the drawback (and committal to black). As I said earlier, any deck can play it, but if we’re putting cards like Gut Shot in our deck we really need to work to get some “extra value”. Young Pyromancer and Monastery Mentor help, as does Abbot of Keral Keep (not just for the prowess, but also for an extra free spell we can cast off our Abbot flip). I was really impressed with Patrick Chapin’s Temur Prowess list from GP Oklahoma City (so impressed I did a video series on it