Are you a Quiet Speculation member?
If not, now is a perfect time to join up! Our powerful tools, breaking-news analysis, and exclusive Discord channel will make sure you stay up to date and ahead of the curve.
Along with Affinity, Burn and Infect once made up the Holy Trinity of blitzing wins in Modern. Times have certainly changed. The Affinity we knew now relinquishes most of its shares to Hardened Scales; Infect's loss of Gitaxian Probe and inherent softness to Fatal Push put a serious dent in its former reign; Burn has more functional Goyfs to worry about than ever. But all three decks continue to exist, with the latter two apparently on the rise.
As far as the Colorless Matchup Guide goes, we've already explored beating Affinity in detail. This week deals with aggro-combo's other Older Gods, Burn and Infect. Both are critical-mass-style decks aiming to assemble a high volume of a certain kind of spell, and both are fine matchups for Colorless Eldrazi Stompy—given, of course, a practiced pilot.
For reference, here's my current list (unchanged since the last Matchup Guide):
Colorless Eldrazi Stompy, by Jordan Boisvert
This has been my go-to build for a while, and I'm not counting on modifying it any time soon. Control decks have taken a light dip in popularity, and Bridgevine has settled out of the top tier, so respective additions of another Spyglass or Surgical now seem excessive. I think if the metagame requires Colorless to be doing something else, such as punishing creature swarm decks, it calls for a different Eldrazi deck altogether—perhaps even my TarmoDrazi build from last week! In an open field, though, or complete darkness, I would sleeve up the above.
Burn
Burn, by Collins Mullen (2nd, SCG Columbus Team Open)
Game 1
I've heard chatter lately in the Eldrazi communities I frequent about Chalice of the Void not being so great anymore, a scenario that's led to the relative dip in performance of Eldrazi decks. I still contend that Chalice is great if backed up by enough pressure or dropped ahead of curve, both things Colorless Eldrazi Stompy is made to do. In any case, Burn is not one of the decks that can shrug off a turn-one Chalice.
 Chalice should be slammed as quickly as possible against Burn—before removal; before creatures; before anything. It can be tempting to curve out naturally with a 3/3 blocker for Guide and then a turn-three Seer, but landing Chalice first outweighs any other plans we might have in game 1, even if we're under pressure. After taking some damage, we can stabilize with Chalice on board and kill opponents before they draw enough two-drops to finish the job.
A key skill to master, and one that comes with many reps, is reading the opponent's hand based on their fetching and sequencing. The information gleaned helps Colorless make crucial decisions that line up optimally against Burn's draw. Some examples:
- If opponents fetch-shock turn one, they may not have any other lands; otherwise, they'd get a Mountain.
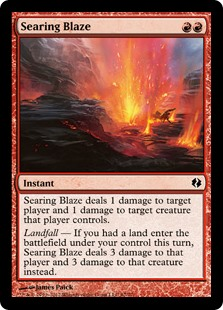
- If they cast Lava Spike, they don't have one-drop creatures or Rift Bolt, and probably have one or more of Searing Blaze, Eidolon of the Great Revel, and Boros Charm—high-impact cards that compensate for not setting up an attacker.
One common decision that benefits from this sort of close-reading is whether to cast Scourge or Reshaper first. Scourge walls Goblin Guide, while Reshaper just trades with it. But Scourge is also removed by literally anything, including Searing Blaze without landfall. As we're unlikely to have tons of mana game 1, let alone enough to cast all our spells,, exiling Scourge with its ability is similar for Burn to just killing it. We'd much rather Reshaper die to a spell, since in doing so it often nets us tempo by casting a creature or playing a land off the top of our library.
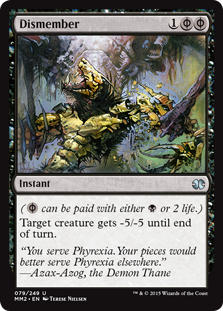
In the event that we know our opponent's on Burn, copies of Dismember and Smuggler's Copter are functional mulligans in an opener. We almost never want to see or cast these cards in a game against Burn. As they're still in our deck for game 1, the best we can do is ship the hand for something else or keep our otherwise great hand and simply take the minus on the chin.
 Sideboarding
-2 Smuggler's Copter
-4 Dismember
+3 Ratchet Bomb
+2 Spatial Contortion
+1 Gemstone Caverns (play and draw)
Burn is too aggressive a deck for us to ever want to crew Smuggler's Copter. In this kind of matchup, we aim to deploy a new threat as a blocker each turn while attacking with the rest of our squad. The pseudo-haste from Copter works against that plan.
While a turn-one Dismember on Goblin Guide or Monastery Swiftspear can pay off in game 1, the card's still a no-brainer cut during sideboarding. Creature removal is valuable in this matchup—just not when it Boros Charms us! On that note, Spatial Contortion fills Dismember's shoes admirably.
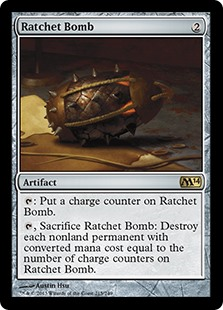 Ratchet Bomb was once a card I once hated siding in against Burn, but had to for lack of something else to replace Copter and Dismember. That was before Ensnaring Bridge took off as a common tech for Burn decks against large creatures. We cannot beat a resolved Bridge except in niche scenarios, such as when opponents do have cards in hand and are at a low enough life total for manlands to tie things up. Even with Chalices on 1 and 2, Burn can take the game with Rift Bolt, Exquisite Firecraft, and Risk Factor should they have enough time to draw those cards. Bomb teams up with Thought-Knot Seer to prevent Burn opponents from cheesing wins. It also has the pleasant upside of killing a creature or two sometimes.
Gemstone Caverns comes in instead of the fourth Bomb for a couple of reasons. For one, with 3 Bomb in the deck, we're likely to see one should Burn have Ensnaring Bridge. Any copy beyond the first tends to be superfluous, especially since there's no guarantee Burn draws Bridge even if they do run it. The other reason is as intuitive as boarding out Dismember: we need to make our land drops against aggressive decks. If we're not deploying threats and disruption throughout the game, Burn will beat us, no matter how fast the Chalice comes down.
Post-Board
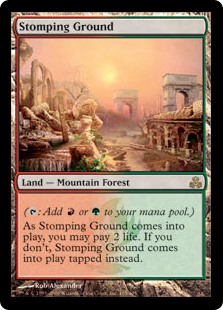 Burn can have a few different strategies after siding. For starters, the deck's colors can vary. Builds with green have a potent answer to Chalice of the Void in Destructive Revelry. If opponents search Stomping Ground in their first two land drops, they probably have Revelry in hand, and are also probably light on lands—otherwise, they'd wait to reveal the green until later. By fetching it fast, they're opening themselves up to Ghost Quarter cutting them off the color for good, although most Burn pilots don't recognize that we have access to this play.
When opponents telegraph a Revelry hand (anemic starts also signal the instant), Quartering the green or playing Thought-Knot Seer first are acceptable detours en route to resolving Chalice. Another solution is to skip 1 and resolve the first Chalice on 2. This play is a bit riskier, since Chalice on 2 also counters Ratchet Bomb, meaning we'll have no way to remove Ensnaring Bridge. It also counters Eldrazi Mimic and Spatial Contortion. Nonetheless, Chalice on 2 tends to hurt Burn more than it does us, and to cripple Burn more after siding than a Chalice on 1 would. A third anti-Revelry measure is to not cast Chalice until Seer can tear it from the hand. This line requires us to have other plays, such as casting creatures, and works best with a Spirit Guide.
Ensnaring Bridge isn't a card all Burn decks run (the one above doesn't, for example), but it's the archetype's single best card against us. Generally speaking, either we remove Bridge or we die. Seer should be saved until the turn before Burn will have three mana to cast a Bridge, and then slammed to clear the coast. We almost always choose Bridge over other targets.
 Other tricks Burn can have up its sleeve include Searing Blood, which hassles Scourge and Mimic but thankfully isn't a very popular side-in from Burn players. Same deal with Grim Lavamancer. There's also Deflecting Palm, which makes Smasher scary for everyone and incentivizes us to peek with Seer before committing to big attacks into untapped Inspiring Vantages. Path to Exile is a card we're sure to see in game 2, but we can use it to our advantage by leading with Reshaper and Seer and making the most out of the extra land. Finally, Burn with Risk Factor has experienced minor success online.
Some more notes on Burn:
- Throwing Quarter at white sources can force Burn to fetch-shock and take extra damage to cast their white spells. Quarter should be paced so that Burn players can't make use of the extra mana from Mountain entering untapped, i.e. on our turn after they've telegraphed no Lightning Bolts
- Burn usually plays 3 Mountain
- Exquisite Firecraft can target and kill Thought-Knot Seer
Takeaways
On paper, our Burn matchup looks amazing. We've got a functional Goyf with Inquisition of Kozilek attached in Seer, plenty of Wild Nacatl-size bodies between Reshaper and Scourge, Smasher and manlands to close out the game, and full sets of Chalice of the Void and Simian Spirit Guide to blank enemy hands before opponents even make one land drop. But the matchup can be close in practice, especially against the rare Burn pilot who boards correctly. Stacks of Paths, Searing spells, and Bridges can line up to complicate our victory.
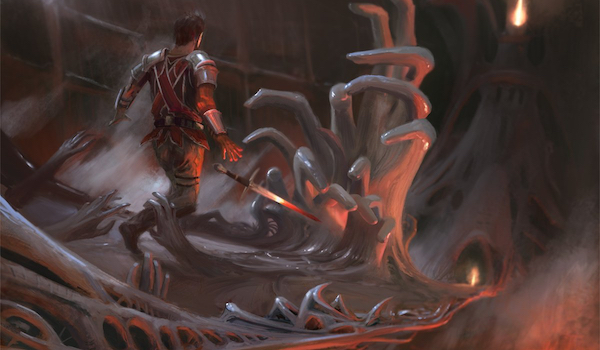
Infect
Infect, by Bradley Tinney (4th, GP Detroit)
Game 1
As against Burn, our first order of business vs. Infect is resolving Chalice of the Void. Chalice prevents Infect from casting most of its pump spells, forcing it to wait until later to kill us with Become Immense. It also blanks some of their creatures. We have some time early on to stick the artifact, as taking a few hits from Glistener Elf or Blighted Agent as we sculpt our hand and board isn't so scary when we can rule out +4/+4 shenanigans. Infect will reliably kill through Chalice later in the game, though, making the card more of a temporary solution than the actual gameplan it is against Burn.
 Next up is blocking. Even without Chalice in play, throwing creatures in front of Glistener Elves is something Colorless mustn't hesitate to do. Our credo: do not take infect damage. We're creature-heavy enough to be able to block almost every turn, forcing opponents to deal us 10 in one fell swoop. And when they're casting their pump spells each turn anyway, so Elf doesn't just die in combat to our 3/3, dealing 10 in a single attack becomes challenging.
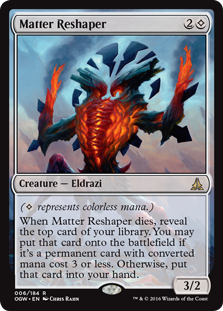
The best early blocker is of course Matter Reshaper, who then flips into more blockers, ramps us into our top end, or, on a good day, draws Dismember. The best late-game blockers are manlands, especially Blinkmoth Nexus, which can block its cousin.
Although not all lists run it, Rancor lines up okay against this strategy. The enchantment allows Infect to trade away creatures instead of pump spells, or continue using pump spells to save its creatures, but push damage through regardless. A timely removal spell can blow out Rancor plays, which conveniently become predictable after we see the card once.
An especially strong Infect player will look to resolve Rancor and then hang back from attacking, stockpiling enough pump spells and protection to go for game later (even through a Chalice). We can only draw so many Dismembers to interact with this play cleanly. Our most reliable counter is to develop a board of our own and be ready to block enough that we don't die. Should opponents wait long enough, we can turn all those creatures sideways and one-shot them ourselves.
With no Chalice, we can still take over game 1 with Seer and Smasher. Our smaller creatures and manlands excel on the blocking front. With a Chalice, game 1 often ends very quickly.
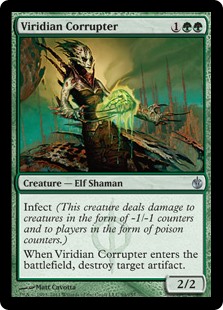 That being said, between Viridian Corrupter and Dissenter's Deliverance, Infect actually has a number of mainboard ways to remove Chalice of the Void. Granted, that number is small (about two copies per deck), and a turn-one Chalice will slow the deck to a crawl regardless. But it's not utterly cold to the artifact, especially if the deck manages to plant an infecter or two first.
Sideboarding
-3 Matter Reshaper
-4 Reality Smasher
-2 Smuggler's Copter
-1 Wastes (on the draw)
+4 Ratchet Bomb
+1 Sorcerous Spyglass
+2 Spatial Contortion
+2 Gut Shot
+1 Gemstone Caverns (on the draw)
This plan swaps our top end for the full removal package, essentially turning us into a Delver deck. Spyglass addresses Inkmoth Nexus, while Bomb covers bases ranging from multiple threats to Shapers' Sanctuary to Invisible Stalker. Copter runs into the same issues here as it does against Burn. Gut Shot is our best card, and we're sort of sad to see Matter Reshaper go (after all, it does block), but need the space.
Post-Board
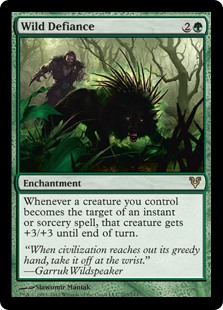 They don't always run it, but Infect's scariest card is Wild Defiance. Defiance turns off most of our removal spells and allows Infect to deal 10 in one attack much more easily, and while the deck is more strapped for cards. Fortunately, our board plan shifts Colorless dramatically.
Gone are Reality Smasher, and Matter Reshaper to block and ramp us into it. Scourge, despite phasing out at the mere sight of a Mutagenic Growth, sticks around for the reason that we can aggressively Powder into removal-heavy hands and still have proactive plays to make. Since we're aspiring to a medium-length game, we'll have enough mana to recast Scourge while holding up blocks and casting removal.
Infect usually has more answers to Chalice after siding, but cannot keep up with our removal. Since all their threats pretty much die on sight, we're in no real rush to kill Infect, so our 3/3s get the job done. Shapers' Sanctuary helps them somewhat on this front, but does nothing in the face of Chalice or Bomb, making it unreliable.
Takeaways
Infect is one of our better matchups, but we do have to watch out for Blossoming Defense. I think this is Infect's best pump spell against Colorless, especially after siding, because of how good it is at blowing out removal wars. An interesting quirk of Spatial Contortion is that it increases the target's power, so casting the instant on an opponent's 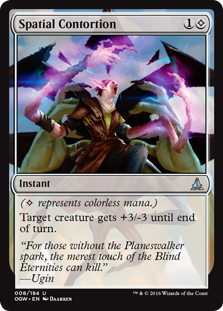 turn can seal our own fate. To avoid this and other embarrassing scenarios, it's best to remove creatures on our turn with spells and on Infect's turn with creatures by casting removal in our main phase and blocking when possible.
Fast, But Not That Fast
There you have it: two grizzled aggro-combo veterans all ready to be pulverized by spaghetti monsters. Does your experience against Burn or Infect on Colorless differ from mine? Do you have anything to add? Which decks would you like to see next in this series? Let me know below.
 Courtesy of GoatBots
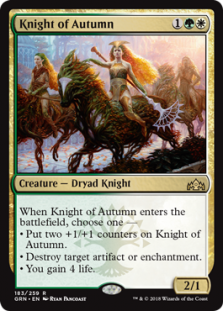 Despite this, I actually expect Knight to see limited play. Its problem are the creature type and the cost. Dryads and Knights don't have any real tribal synergies at all, while Sage does; Elves doesn't have a reason to switch. Costing white and green means Autumn is far less splashable than Finks; Kitchen Finks can be played in mono-white or green, while Autumn must go in a two-color deck.
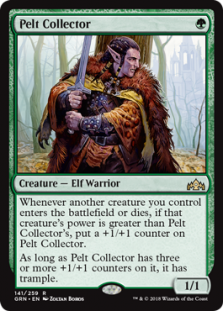 single tribe. Gaining trample once it hits 4/4 is a very nice touch. Of course, that's also likely as large as Collector will be growing on its own, since green creature decks
 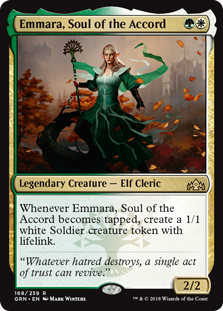 Against UW Control, Emmara is an army unto herself, and a priority removal target. UW Control
 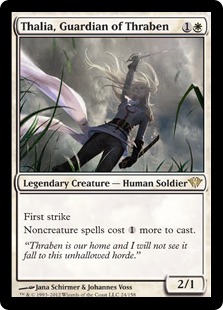 The difference between Hatebears and Taxes isn't just about color. Taxes decks rely on Thalia, Guardian of Thraben and Leonin Arbiter coupled with Ghost Quarter and Field of Ruin to attack an opponent's mana, grind down their engines, and win via many small, disruptive creatures. These decks use Aether Vial coupled with Flickerwisp and Restoration Angel to play around removal and gain card and mana advantage. However, Humans uses Thalia more effectively than Death & Taxes because it kills faster. Its other disruptive creatures are also relevant more often than Arbiter, meaning it's gotten hard to justify Taxes over Humans.
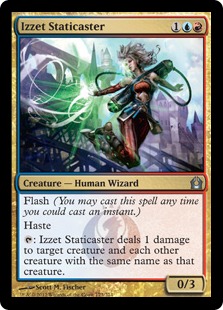 without Vial, it proved easy to fall behind. D&T is also very weak to decks that can go wide and tall, which is a Humans specialty. Since then, Humans has adopted Izzet Staticaster, which wrecks the low-toughness creatures in Taxes. One available solution is to sideboard into a white control deck, but Humans is built to pick apart slower decks, so the matchup is just tough.
 Hatebears has a number of advantages game 1 against both decks. UW only definitely
  Hangerback Walker are nightmares for D&T's tiny creatures. Absent Phyrexian Revoker, a single large Ballista is often game over, making Taxes more reliant on Stony Silence than before.
 Inquiry against its controller with Smiters and Lieges. There's also the statistically implausible chance that we discard all three Lieges, there's no opposing Hollow One, and we crash in for 24 damage on turn one!
 TarmoDrazi was born from a joke gone wrong: the weekend following Eye of Ugin's
  Version 2
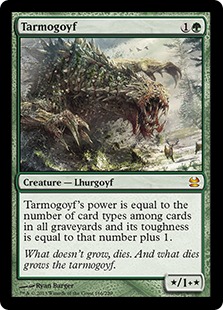
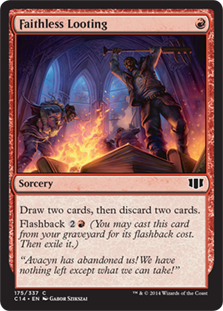 Faithless Looting further adds to our velocity factor, chewing through ill-fitting pieces in hand while growing Tarmogoyf and enabling Traverse the Ulvenwald in linear matchups. Those matchups have always peeved TarmoDrazi, as when opponents weren't stripping our cards with Thoughtseize, amassing delirium could prove cumbersome. Looting even improves the midrange matchups by dumping lands for business in the mid-game. Of course, it doesn't hurt that our "business" is midrange's Public Enemy No. 1, Reality Smasher.
 Modern already has a
  Noble Hierarch remains critical to the strategy, baiting out removal and feeding the creature type to delirium. With Fatal Push in the picture, this role is
 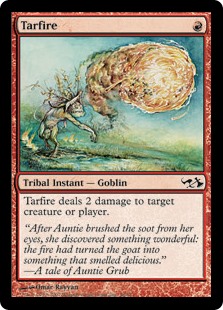 After experimenting with varying numbers, I think 4 Tarfire is definitely correct. No other card in the deck is worth two card types. It turns out taking a minus in matchups with few Tarfire targets is worth having delirium active from the game's outset.
 While
While 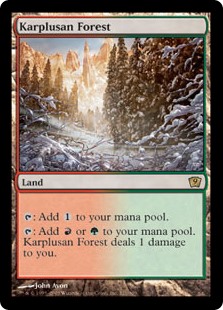 Colorless producers: Karplusan Forest seems like the better land, since a reach-inclusive aggro deck doesn't really want to gain opponents life. But it seems including Grove of the Burnwillows has some merit, as with both lands in play, pilots can choose whether to give life or take damage. Similarly, seeing both lands off a Stirrings lets us select the best one for the matchup.
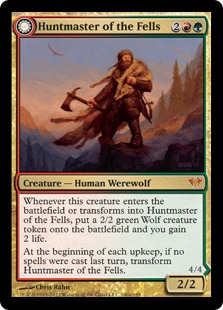 The sideboard, too, is a work-in-progress. Lately, I'm wondering if Huntmaster of the Fells and Magus of the Moon can be cut. The former seems a little redundant as a bullet—if we've stabilized the board, won't Tireless Tracker or Smasher put the game away, even against small creature decks? As for the latter, are there decks besides Tron it's there for? If not, I'd rather have a third Damping Sphere.
 The rest of the sideboard feels great. Dire Fleet Daredevil
 Bomat Courier is an incredibly powerful card and has certainly demonstrated that in Standard. It presents pressure in the form of inevitable card advantage that must be dealt with, all at the low cost of one mana. Despite its efficiency, the deckbuilding constraints Bomat Courier puts on a deck are fairly significant. To cash in on the card advantage machine, you need to have few, preferably zero cards in hand. The type of deck that wants this card will be emptying its hand quickly to prepare to reload. Not many decks can or are actively looking to do that, but the ones that do will be happy to have it.
 Erayo, Soratami Ascendent may fit more under the category of pet card rather than secretly powerful card in Modern. Part of me just really wants this card to work, but I should still try to honestly evaluate this card. When looking at the power of a card, It is important to weigh the setup cost against the payoffs. If the payoff does not overcome the amount of setup required, then the card is not worth playing. If it feels like you are having to do too much to make a card work, than you almost certainly are.
 Utopia Sprawl is a unique ramp spell in Modern. It is a one-mana ramp spell that is not a creature. If you want that type of effect in Modern, typically you would have to play Noble Hierarch or Birds of Paradise. Unlike those staple mana dorks, Utopia Sprawl isn't vulnerable to removal spells, which makes it more reliable. We've seen a little bit of Utopia Sprawl in Modern in decks like Ponza or Green Devotion, but I think it could easily spawn other archetypes.
 Mausoleum Secrets is a bit of a bold prediction. This card could very easily never see play in Modern. It is a two-mana tutor though, and that is very exciting. Modern does not have many tutors on the cheap. Traverse the Ulvenwald requires too much setup to reliably be used in a combo deck. Time of Need is a bit too narrow to be effective. Summoner's Pact has been the most impactful in Modern, seeing play in Amulet Titan and Valakut, the Molten Pinnacle strategies. Mausoleum Secrets might fall into one of these categories, but I can’t really be sure without playing with it.
 Not only is the strategy overall awkward, it is fragile too. One or two discard spells or any graveyard hate is often enough. All of that aside, Goryo's Vengeance on Griselbrand is a powerful combination that leads to a number of turn-two kills.